 Ubuntu Phone documentation
Scopes tutorials - location awareness for scopes
Ubuntu has a solid location stack, allowing users to select which applications have access to the device location. This also applies to scopes and is very easy to add to your code. In this short tutorial, you are going to learn how to bring location awareness to your scope.
For this example, we are going to use a default scope template. Let’s start by opening QtCreator and create a new scope project using the HTTP + JSON API template.
Location settings
The first change we are going to make is in the
Open src/data/<scope>.ini.in in the editor and add the following
declaration to its ScopeConfig section, or copy the content of the examplefile:
LocationDataNeeded = true
This will automatically add a setting to your scope, allowing the user to toggle location data access. Note that it will be enabled by default. If you run the scope at this point, you should see a new “Settings” entry in the header, with an “Enable location data” checkbox.
Location data
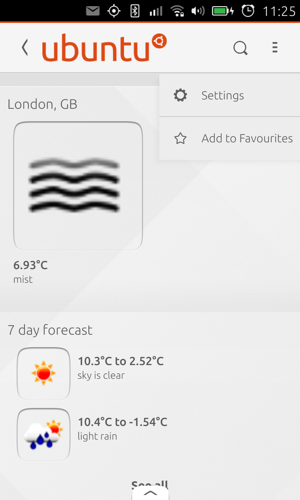
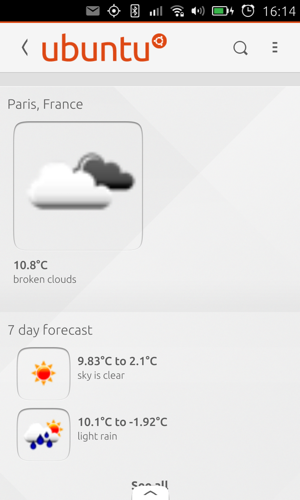
The template we are using is querying openweathermap.org to get current weather. We are going to change it to use the user city and country, instead of the hardcoded “London” query done by default.
When you are requesting location data, here is what the scopes API is giving you access to :
Coordinates
- altitude
- latitude
- longitude
- horizontal_accuracy
- vertical_accuracy
Toponyms and codes
- city
- region_name
- country_name
- area_code
- country_code
- region_code
- zip_postal_code
Have a look at the API documentation to dive in all the details. As you will
see, each location data element has an equivalent has__element_() function to
ensure its availability.
Changing the query
For the rest of the tutorial, you only need to edit src/query.cpp.
First, we are going to add a new include to get the search metadata associated to each query:
#include <unity/scopes/SearchMetadata.h>
Then, in the Try part of Query::run(), we can request location data from
this metadata object. Reproduce the following lines or copy the content of the
example file:
// A string to store the location name for the openweathermap query
std::string place;

// Access search metadata
auto metadata = search_metadata();

// Check for location data
if (metadata.has_location()) {

     auto location = metadata.location();

     // Check for city and country
     if (location.has_city() && location.has_country_name()) {

         // Create the "city country" string
         place = location.city() + " " + location.country_name();

     }
}

// Fallback to a hardcoded location
if (place.empty()) {
    place = "London";
}
Now, we just need to use the place variable in our default query:
if (query_string.empty()) {

     // If the string is empty, get the current location weather
     current = client_.weather(place);

} else {

     // otherwise, get the current weather for the search string
     current = client_.weather(query_string);

}
That’s it! The scope should now be able to surface weather data for your location when you open it.
Next steps
Now that you have seen how to add more context to scope queries, you should have a look at the Settings tutorial to give users more freedom to customize your scope and adapt it to their needs.